1.Take your (2) 12x12 white cardstock and cut them to 6x12
2.Now fold each of them in half to look like 6x6 when folded
 3.Take one of the 6x6 and open it; add adhesive to the back of another 6x6 and put it on top
4.Repeat the steps all around till it looks like a cross
 5. Folding – start from the top and bring it down, then the bottom goes up to fold; right one then left
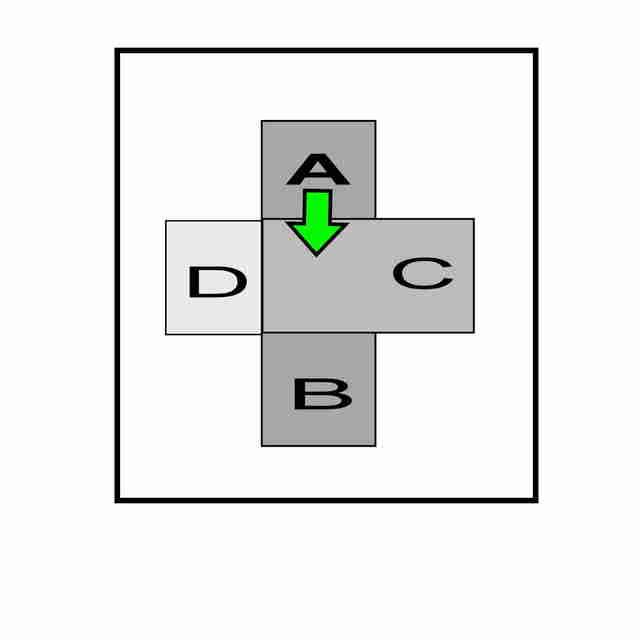 .Decorate the front of the brag book
7.Cut Dream Street-Café Chic Straight up pp 5 ½ x 5 ½ and ink it ( optional) then glue it down
8.Cut template of bracket and trace it on Dream Street- Café chic Lounge pp and cut it out, ink it then glue it down on the left side of the brag book.
9. After that, cut the flowers from Dream Street- Café Chic Straighten up , ink it then glue it down
10. Grab your sticker alphabet and the word “My Family” then glue two buttons on the large flower
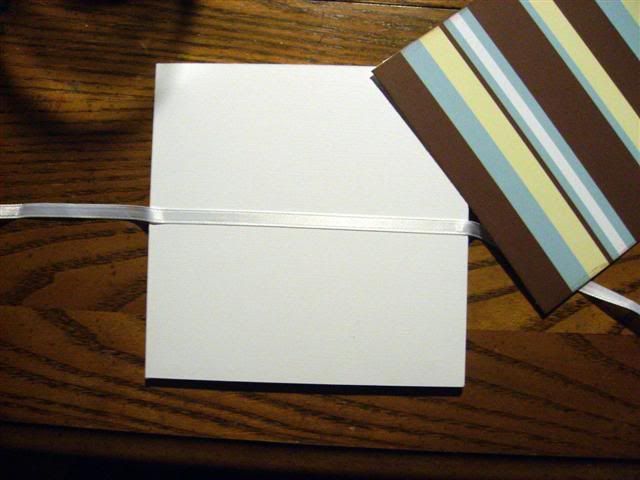
11. Now flip the brag book to the back and lets cover the 4 areas of the brad book
Cut (2) 5 ½ x 5 ½ of the Dream Street Café Chic Straight up pp and ink it
Cut (2) 5 ½ x 5 ½ of the brown cardstock and ink it
•Add some glue to the middle of it and add the ribbon across of it then
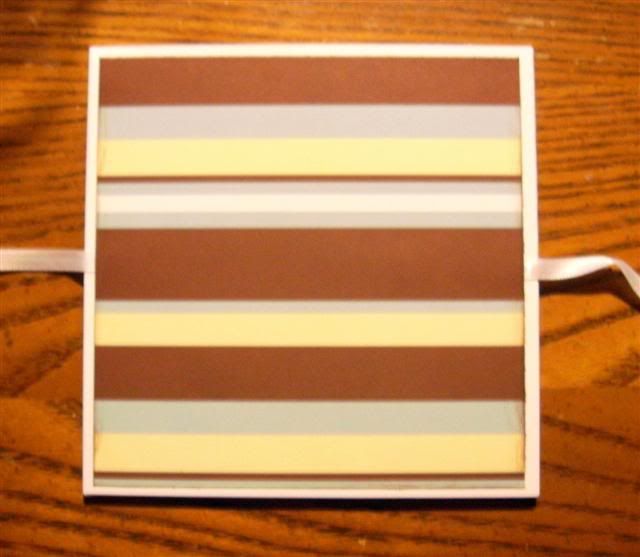 •Adhere the DS paper in the middle and the brown cardstock will the top and bottom of the brag book
•The DS café chic straight up on the left- cut a circle from DS café chic fashionista , add a button in the middle then use your alpha stickers and put “Love” there
•Top of brown cardstock, cut 4x5 DS café chic lounge and use your alpha letters to say “sweet”. I have it the other way because when you look at the book it should have the words straight so that’s why the words are upside on the photo
•Bottom brown cardstock, take a scrap piece of paper from the DS café chic lounge pp then use your alpha letters to say “always”
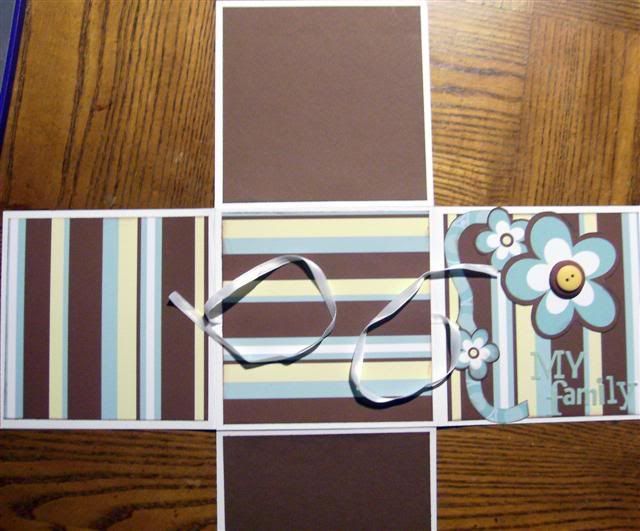

112. Inside the bag book, cut and glue then down
(2) 5 ½ x 51/2 DS café chic fashionista
(2) 5 ½ x 5 ½ DS DS café chic lounge
(1) 5 ½ x 5 ½ brown cardstock
•Adhere (2) DS café chic fashionista on the top and bottom of the brag book- take the large tag template and trace it on DS café chic lounge scrap paper , ink it then staple the white ric rac on top. After that glue it down on the side of the fashionista paper. Repeat this step and put the other tag on the other fashionista paper . Put the tag on the opposite of the other tag
•Adhere (2) DS cage chic lounge on the left and right of the book- cut some circles from café chic fashionista scraps and adhere then off the paper and trim if needed
•Adhere the brown cardstock in the middle of the book- take a strip of a scrap from café chic straight up and glue it down on the bottom of the cardstock, add two buttons on that strop and get your alpha stickers and out “Our Treasure” on it


Comments